Knitted Odd Ball Scarf
Oh, the Knitted Odd Ball Scarf is an absolute gem! This whimsical and charming accessory is made by using a variety of mismatched yarns, resulting in a unique and eye-catching design that adds a fun touch to any outfit. With its colorful and eclectic appearance, this scarf is perfect for those who love to stand out and embrace their individuality. The beauty of the Knitted Odd Ball Scarf lies in its unpredictability - you never know what color or texture will come next, creating a delightful element of surprise with each stitch. This playful accessory is sure to spark conversations and bring smiles wherever you go. Get ready to wrap yourself in warmth and creativity with this delightful and one-of-a-kind scarf!
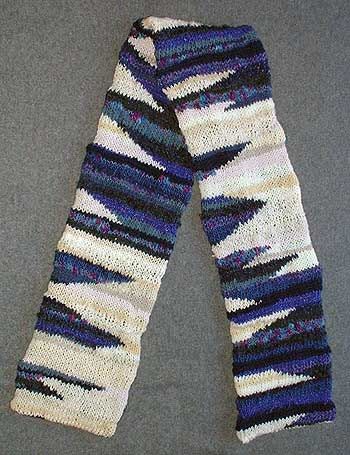
This scarf is about 7.5 inches wide and as long as you want (6 feet is a good size). The width is based on an approximate average gauge of 4 sts per inch on size 10.5 (US) needles. I used approximately 30 different colors and fibers for this scarf. Select colors from two contrasting color groups (in this case, I used blue and white). The scarf is doubled and sewn together and that makes it very, very warm.You could make this scarf using only two yarns as well, one for each contrasting color. Two variegated yarns would be very interesting.There are not exact row by row instructions for this scarf. Follow the general outline as written or the chart below but feel free to experiment as you go; this is free form knitting!
o avoid tangles, cut your yarn in manageable lengths. You may want to vary it and cut some as sort as 3 feet and others 12 feets.CO 60 sts with one color and k one row.
Next row: P across as many sts as you want, then add a color from the second color group and p across the rest of the row.Remember, you are working with two colors on one row and using a technique called intarsia. Pick up the new color from behind the old color to avoid holes. If you make a mistake, you will see it within two stitches.Every row, move the color groups to the right or the left by two sts. Change directions as often as you wish. Change the yarn within the two color groups as often as you wish; I did not work more than 3 rows with any single color. Remember that the scarf will be sewn in half vertically so make sure your color groups move from one half of the scarf to the other so they will be visible on both sides when completed. Below is a photo of the scarf while still on the needles, before it was seamed.

After about 18 inches, reverse the color groups so that the rows begin and end with the opposite color group from what you had been using. Continue reversing color groups every 18" until scarf is desired length. Work a RS row with the same color you used to CO and BO. Leave a long tail for seaming.Weave in lots of ends while watching a good movie on television.Fold scarf in half vertically. Seam using mattress stitch. Starting at the horizontal left bottom corner, begin seaming using the tail across the bottom, then up the sides and finally the top. The last bit of seaming is a little difficult but can be done. Whip stitch the last corner and weave in end as invisibly as possible.