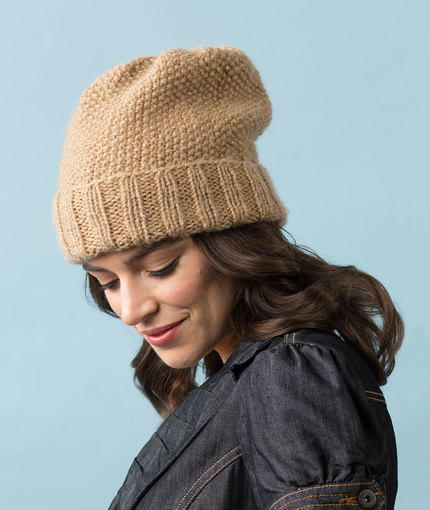
Knitted Camel Seed Stitch Slouchy Hat
Imagine a cozy, handcrafted camel-colored slouchy hat made with a unique seed stitch pattern. This hat is not just any ordinary accessory - it is a stylish and versatile piece that adds a touch of warmth and charm to any outfit. The intricate knitting technique used to create this hat gives it a textured look that is both eye-catching and trendy. The Knitted Camel Seed Stitch Slouchy Hat is the perfect blend of comfort and style. Its relaxed fit allows for a casual, laid-back look while still keeping you warm during chilly days. Whether you're running errands or meeting friends for coffee, this hat is sure to become your go-to accessory for adding a touch of sophistication to your ensemble.
Knitting Needle Size8 or 5 mm
Yarn Weight(4) Medium Weight/Worsted Weight and Aran (16-20 stitches to 4 inches)
Gauge16 sts = 4” [10 cm]; 29 rows = 4” [10 cm] in Seed Stitch. CHECK YOUR GAUGE. Use any size needle to obtain the gauge.
Finished Size Hat Measures: 18 (20)” [46 (51) cm] in circumference. Finished Length: 9 (10)” [23 (25) cm] with cuff turned up.
Materials List
- RED HEART® Boutique Gleam™: 1 ball 3305 Toasty/Gold
- Susan Bates® Knitting Needles: 5 mm [US 8]
- Yarn needle
Seed Stitch Knit Hat Pattern
This hat is knitted flat and seamed. Directions are for size Small/Medium with changes for size Large/Extra-Large in parentheses.
Pattern Stitches
- 2x2 Rib
Row 1 (Right Side): *K2, p2; repeat from * to last 2 sts, k2.
Row 2 (Wrong Side): Knit the k sts, purl the p sts. Repeat Rows 1-2 for 2x2 Rib. - Seed Stitch
Row 1 (Right Side): *K1, p1; repeat from * to end of row.
Row 2 (Wrong Side): *P1, k1; repeat from * to end of row. Repeat Rows 1-2 for Seed Stitch. - Stockinette Stitch
Row 1 (Right Side): Knit all stitches.
Row 2 (Wrong Side): Purl all stitches. Repeat Rows 1-2 for Stockinette Stitch
Knit Hat Pattern
- Start of Cuff. Cast on 74 (82) sts.
- Next Rows: Work in 2x2 Rib for 3” [8 cm], ending on a Wrong Side row.
- Next Row (Right Side) Turning Row:Knit across row.
- Next Row (Wrong Side): Work in 2x2 Rib across row.
- Next Rows: Continue working in 2x2 Rib until piece measures 6” [15 cm] from caston edge, ending on a Wrong Side row.
- Begin Body of Hat
Next Row (Right Side): Knit 1 edge stitch, work in Seed Stitch to last stitch, knit 1 edge stitch. Keeping first and last stitches in Stockinette Stitch for edge stitches, and remaining stitches in Seed Stitch, continue until piece measures 7 (8)” [18 (20) cm] from Turning Row, ending with a Wrong Side row. - Begin Shaping the Crown
Row 1 (Right Side) decrease: K1 edge st, *work 6 sts in Seed Stitch, k2tog; repeat from * to last st, k1 edge st—65 (72) sts. - Row 2 (Wrong Side): P1 edge st, *work 6 sts in Seed Stitch; repeat from * to last st, p1 edge st.
- Row 3 (Right Side) decrease: K1 edge st, *work 5 sts in Seed Stitch, k2tog; repeat from * to last st, k1 edge st—56 (62) sts.
- Row 4 (Wrong Side): P1 edge st, *p1, work 5 sts in Seed Stitch; repeat from * to last st, p1 edge st.
- Row 5 (Right Side) decrease: K1 edge st, *work 4 sts in Seed Stitch, k2tog; repeat from * to last st, k1 edge st—47 (52) sts.
- Row 6 (Wrong Side): P1 edge st, *p1, work 4 sts in Seed Stitch; repeat from * to last st, p1 edge st.
- Row 7 (Right Side) decrease: K1 edge st, *work 3 sts in Seed Stitch, k2tog; repeat from * to last st, k1 edge st—38 (42) sts.
- Row 8 (Wrong Side): P1 edge st, *p1, work 3 sts in Seed Stitch; repeat from * to last st, p1 edge st.
- Row 9 (Right Side) decrease: K1 edge st, *work 2 sts in Seed Stitch, k2tog; repeat from * to last st, k1 edge st—29 (32) sts.
- Row 10 (Wrong Side): P1 edge st, *p1, work 2 sts in Seed Stitch; repeat from * to last st, p1 edge st.
- Row 11 (Right Side) decrease: K1 edge st, *work 1 st in Seed Stitch, k2tog; repeat from * to last st, k1 edge st—20 (22) sts.
- Row 12 (Wrong Side): P1 edge st, *p1, work 1 st in Seed Stitch; repeat from * to last st, p1 edge st.
- Row 13 (Right Side) decrease: K1 edge st, k2tog to last st, k1 edge st—11 (12) sts. Cut yarn leaving a tail 20” [51 cm] long. With yarn needle, draw tail through remaining sts twice, pull tightly and secure.
Finishing
- With Right Side facing, sew seam from top down to turning row. Then turn hat inside out with Wrong Side facing and sew remainder of cuff as established. Weave in ends.