Knitted Godric’s House Color Cowl
Introducing the Knitted Godric's House Color Cowl, a unique and stylish accessory that is sure to catch everyone's attention. This beautifully crafted cowl is not just any ordinary piece of knitwear, but a tribute to the iconic Godric's House from the world of magic. Made with the utmost care and attention to detail, this cowl showcases the vibrant colors and intricate patterns that represent the essence of Godric's House. This exquisite piece is a true work of art, combining the warmth and comfort of a cowl with the whimsical charm of the Godric's House design. The carefully chosen yarns and expert knitting techniques ensure that this cowl is not only visually stunning but also incredibly soft and cozy to wear. Whether you're a fan of the magical world or simply appreciate the beauty of fine craftsmanship, the Knitted Godric's House Color Cowl is a must-have accessory that will add a touch of magic to any outfit.

Skill: Easy
Materials
- US size 11/8 mm straight or circular needles – (I love and use my *Lykke interchangeable set for everything!)
- 2 skeins each of Lion Brand Wool-ease yarn in Cranberry (Color A) and Gold (Color B)
- scissors
- tapestry needle
- blocking mat (optional)
- blocking pins (optional)
Gauge
14 stitches/21 rows per 4″ square
Finished size
11.75″ H x 16.5″W (laid flat)
Abbreviations
- k – knit
- p – purl
- p2tog – purl 2 stitches together (decreases stitch count by 1)
- CO – cast on
- BO – bind off
- RS – right side (visible stockinette stitch)
Pattern Notes
Pattern is worked continually throughout holding 2 strands of worsted weight yarn.
Pattern Instructions
- Holding 2 strands of Color A held together, CO 54 (I used the long tail CO method). Leave a long tail to use for seaming at the end, approximately 60″ in length.
- Row 1: K across.
- Row 2: CO 1 at beginning of row using the single cast on method (or backward loop method) to increase stitch count by 1, P across until 2 loops remain of left needle. P2tog to decrease.
- Repeat Row 1 and 2 nine more times for a total of 20 rows.
- Switch to Color B. Repeat Rows 1 and 2 ten times for a total of 20 rows.
- Switch back to Color A. Repeat Rows 1 and 2 ten times for a total of 20 rows.
- Repeat step 5.
- Repeat step 6.
- Repeat step 5 once more.
- BO and weave in your ends.

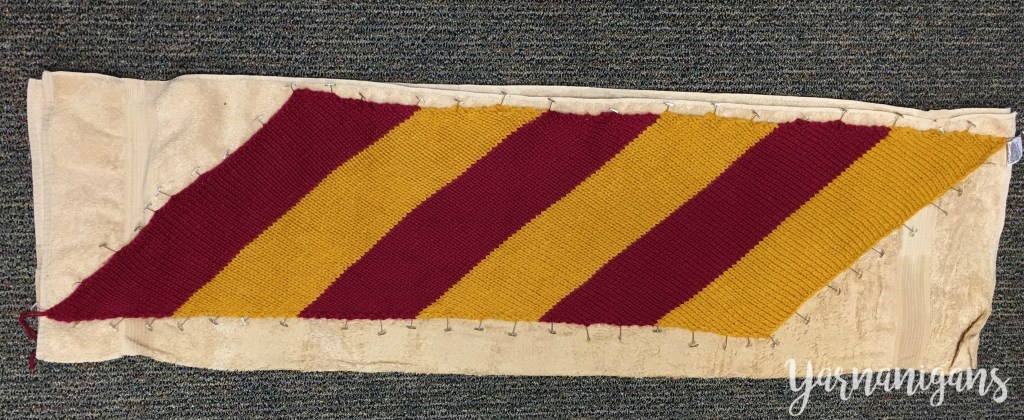
Wet blocking the cowl really made the fibers open up and feel luxurious.
Finishing Instructions
- Feel free to block your cowl to give the acrylic/wool blend some fluidity and uniformity. It’s not a necessity but I highly recommend it!
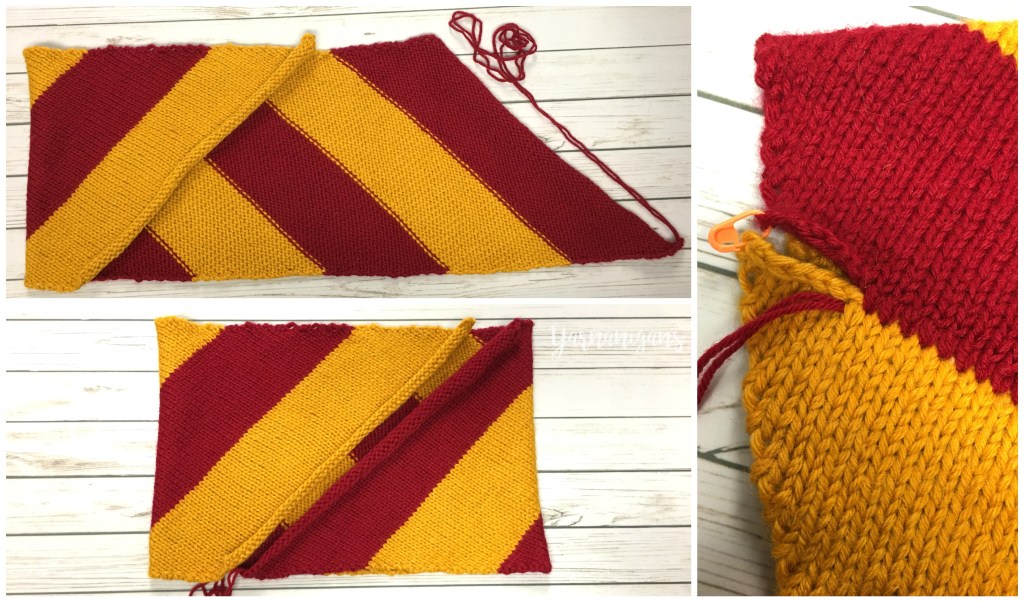
- Lay your cowl RS down, and fold over both ends (as pictured below) and place the two edges together so that they line up stitch by stitch.
- With your long tail of yarn and a tapestry needle, use an invisible horizontal seam to stitch the two ends together. To do this, place the needle under the first edge stitch on one side and pull the yarn through. Place the needle under the first edge stitch on the opposite side that lines up with the previous stitch. Pull the yarn through. Place the needle under the next stitch on the first side. Continue stitching back and forth like this until the seam is complete.
- Fasten off and weave in your ends.

Seaming up the edges of the cowl using the horizontal invisible seam